Raytracer

Raytracer created in C++ using my own Math Library and Unit tests.
About the Raytracer
As part of my University studies, I worked on a raytracer in C++, using my own math library and creating unit tests for it.
The essence of the ray-tracing algorithm is to render an image pixel by pixel. For each pixel, it launches a primary ray into the scene, its direction determined by drawing a line from the eye through the pixel's center. This primary ray's journey is then tracked to ascertain if it intersects with any scene objects. A secondary ray, known as a shadow ray, is then projected from this nearest intersection point towards the light source.
The objects in the scene can have different shapes and properties such as color, reflectiveness, specular shading, etc. and the correct pixel color is calculated using the ray intersection with the object.
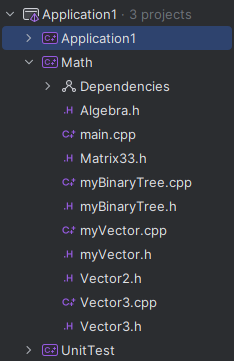
The solution is made up of 3 projects: the Raytracer, the Math library and the Unit tests
Math Library
As part of the project, we had to write our own math library to use custom C++ variables such as Vector2, Vector3 or Matrices. This was a great opportunity to refresh my algebra knowledge and make use of C++ basics instead of just using an external library.


Writing Vector2 and 3 by 3 Matrix functionality
Unit Tests
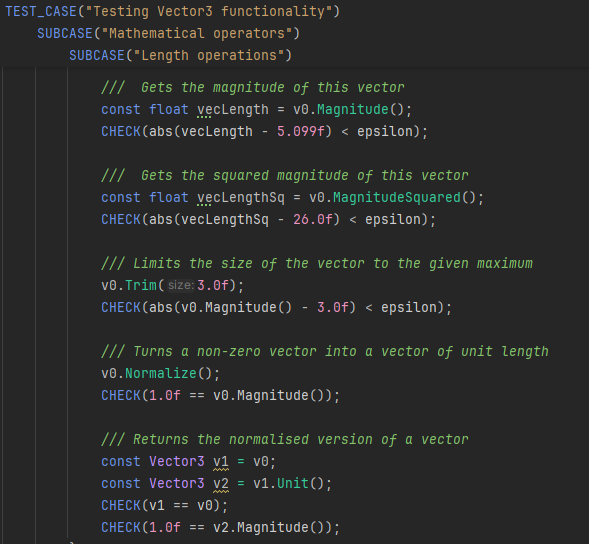
For writing unit tests, I used the doctest library which is just a lightweight testing framework. I tested all functionality for my math library classes.
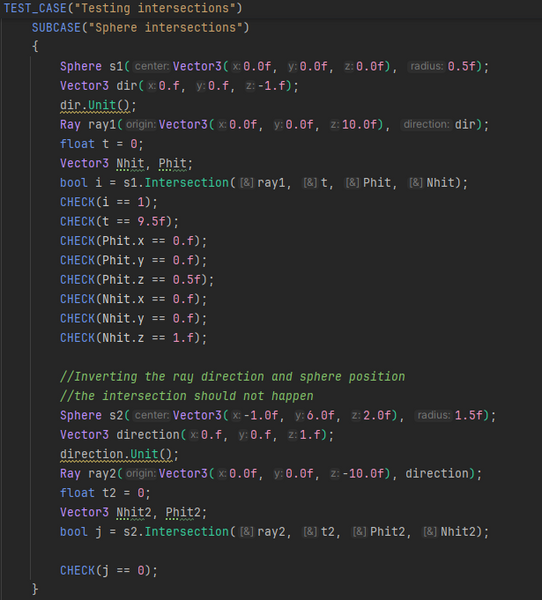
I even tested basic raytracing functionality, such as ray-object intersections.
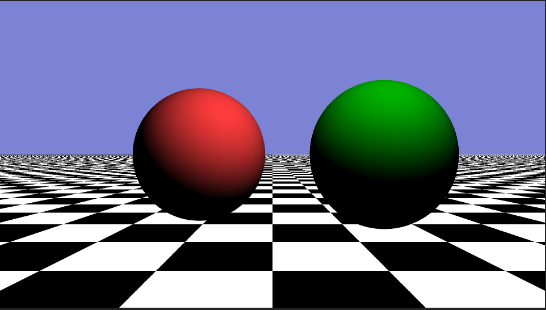
Spheres & Planes
Drawing spheres

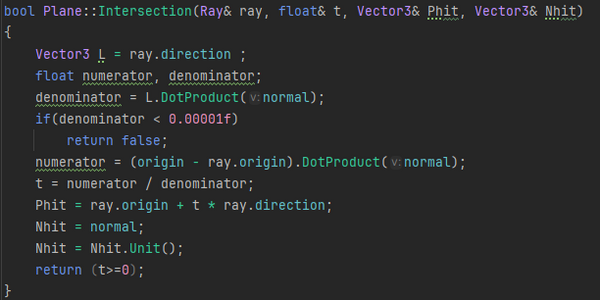
Ray-Plane intersection calculations
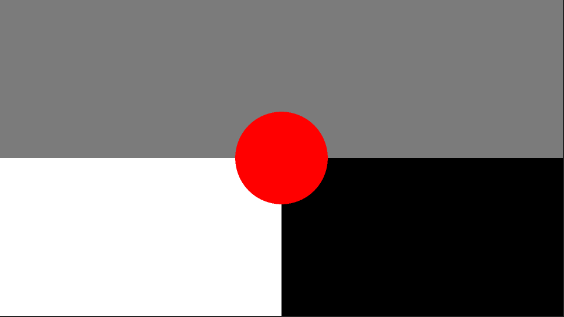
Going over every pixel on screen and sending a ray through it to determine if an object is hit and compute the corresponding color


Ray-Sphere intersection calculations

Attempts at drawing a checkerboard patterned plane

Shading & Shadows
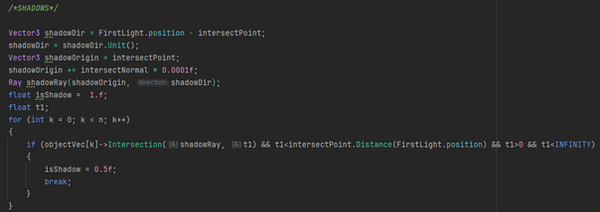
A primary ray is cast through the pixel center to detect object intersections. Upon finding one, a shadow ray is dispatched to determine the illumination status of the point. An intersection point is considered illuminated if the shadow ray reaches the light source unobstructed. If it intersects another object on the way, it signifies the casting of a shadow on the initial point
Secondary rays are sent from the primary ray intersection point to the light source and that's how we determine what is in shadow
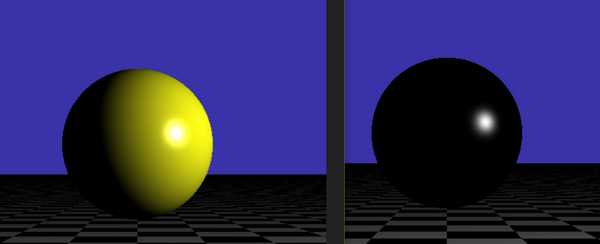
Shading spheres using the Blinn-Phong model and one lightsource

Checkered plane is functional and shadows are calculated
Adding a Specular component
Computing the color of the pixel at a certain point on the sphere

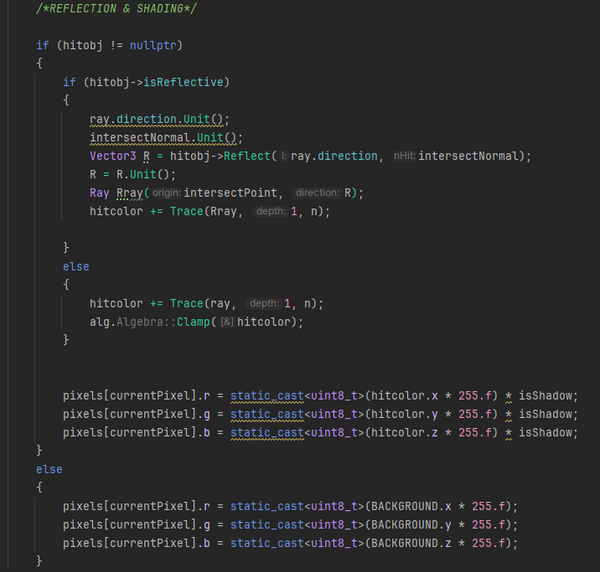
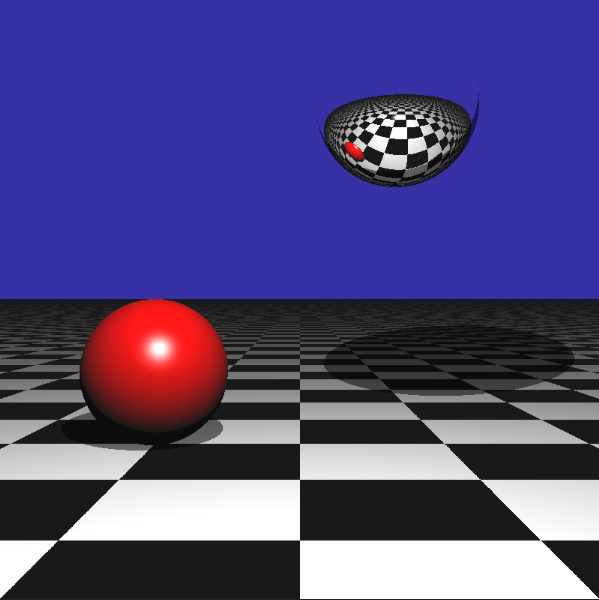
Reflection
The directions for both reflected and refracted rays are determined by the surface normal at the point of contact and the incident ray's approach.
Reflection is as far as I have reached with my raytracer and I wish I had more time to work on refraction and optimizing the code for many objects using techniques such as bounding volume hierarchy (BVH). This project was a really valuable learning experience and one of the toughest challenges for me. I spent a lot of time staring at unusual colors being drawn on my screen and debugging to solve these issues. With more time and love I am sure this can turn into quite an impressive project!
2 reflective spheres

Same image from front and back angles

Final result:
